Windows operating systems have evolved a lot in the recent past and come up with a lot of advanced features. There are a few inbuilt utilities that can help you boost gaming performance on Windows. You can optimize Windows with these inbuilt features and also make use of the best PC optimizer for Windows. Let’s explore these quick and simple tricks to boost gaming performance.
Enable Game Mode
Game Mode is a customized setting to enhance gaming performance while boosting PC performance. It customizes the graphics, RAM, and other settings for uninterrupted gaming.
Step 1. Right-click on the Start button and click on the Settings option.
Step 2. Select the Gaming option from the available options.
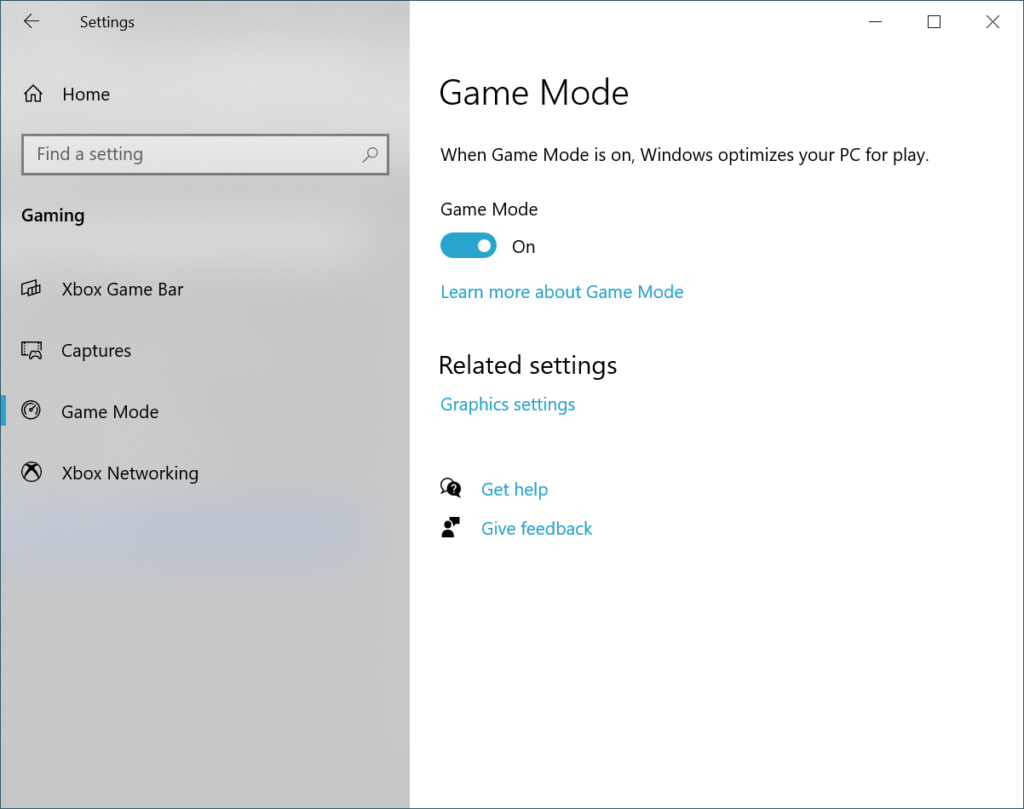
Step 3. Select the Game Mode from the left-hand side panel. Click to enable the Game Mode and close the window. It should enhance the gaming performance.
Disable Automatic Updates
Automatic Updates can interrupt your gaming experience or may download an incompatible driver. You have no option to disable it forever but you can at least disable it for up to 35 days.
Step 1. Right-click on the Start button and click on the Settings option.
Step 2. Select the Update & Security option from the available options.
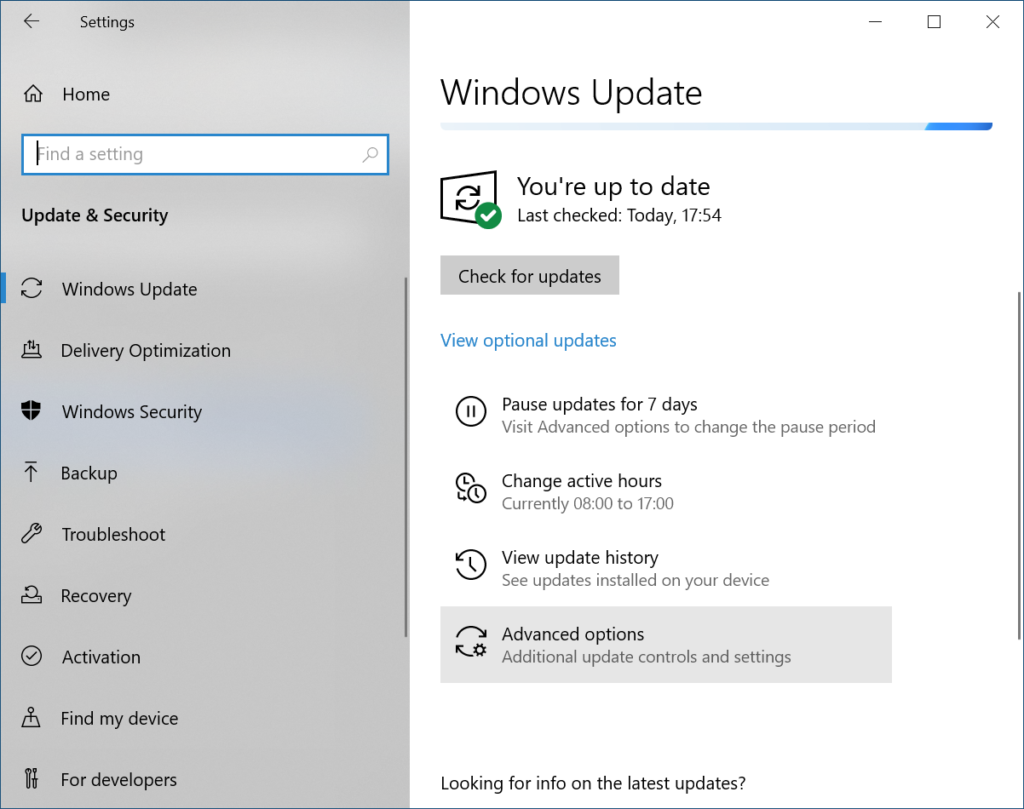
Step 3. You will be on the Windows Update page. If you wish to disable it for 7 days, you can click on the ‘Pause updates for 7 days’ option below the ‘Check for Updates’ button.
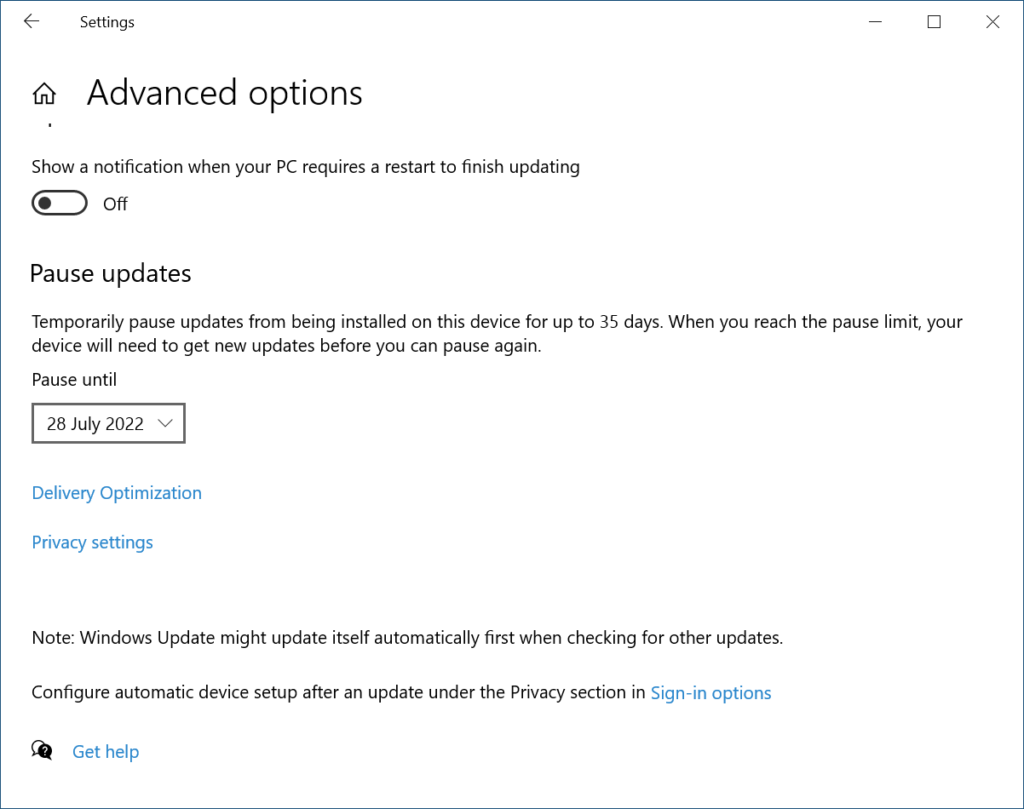
Step 4. You can disable Windows Updates for over 35 days with the Advanced Options button. Click on the Advanced Options and under the Pause Updates section, click on the date till when you wish to disable Windows Updates.
Update Necessary Hardware
Not every game can be compatible with your hardware configuration. You need to check the compatibility according to your hardware configuration. If the game is not compatible, it won’t run or give you performance issues.
You can also upgrade your hardware like RAM, Graphics Card, Processor, or the Sound Card if required. It’s easy to upgrade a desktop PC rather than upgrading a laptop as it will be a costly affair. Always install genuine and compatible hardware devices to combat compatibility issues.
Update Faster DNS Settings for Online Gaming
Online gamers can tweak settings and update DNS service with a faster DNS server. The settings are easy to configure and give better online gaming performance.
Step 1. Press (Win + I) to get into the Settings window.
Step 2. Click on the Network & Internet option from the list.
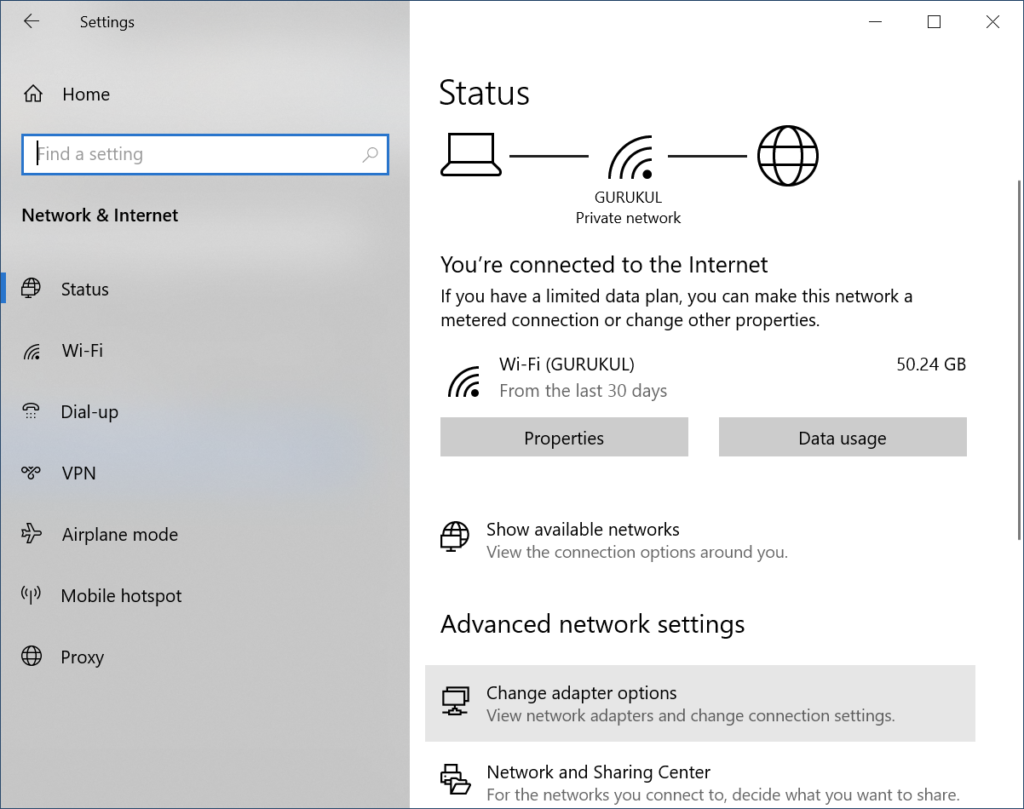
Step 3. Click on the Change Adapter Settings button on the window.
Step 4. A new window will appear with available network configurations. Right-click on your wireless network and go for the Properties option.
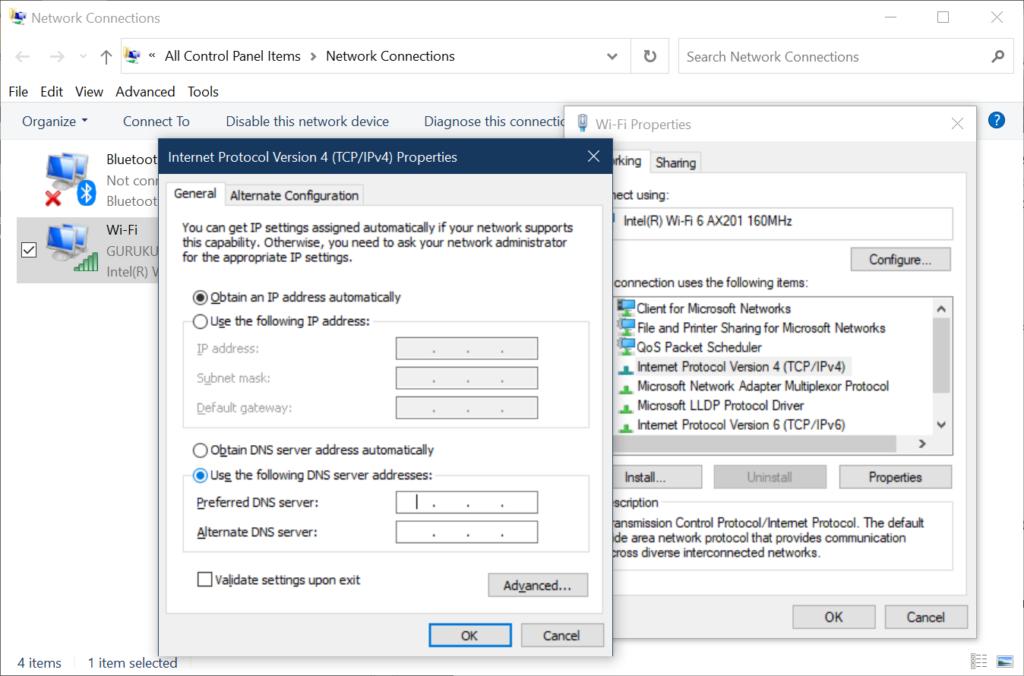
Step 5. Select internet protocol version 4, take a screenshot of the current settings, and click on the Properties button. You can also double-click on internet protocol version 4 to get the properties.
Step 6. If it is set to automatically obtain a DNS server, replace it with 1.1.1.1 and 1.0.0.1 as your DNS server. Click on the Ok button to save settings and come out of the window. Restart your computer for the changes to get into effect.
Disable Notifications While Playing Games
Notifications popping up can also daunt your gaming experience. You can optimize Windows 10 for gaming by disabling notifications. It is quick and easy to disable the notifications when you are playing games or on a full screen.
Step 1. Press (Win + I) to enter Windows Settings.
Step 2. Click on the System option and go for the Focus Assistant option.
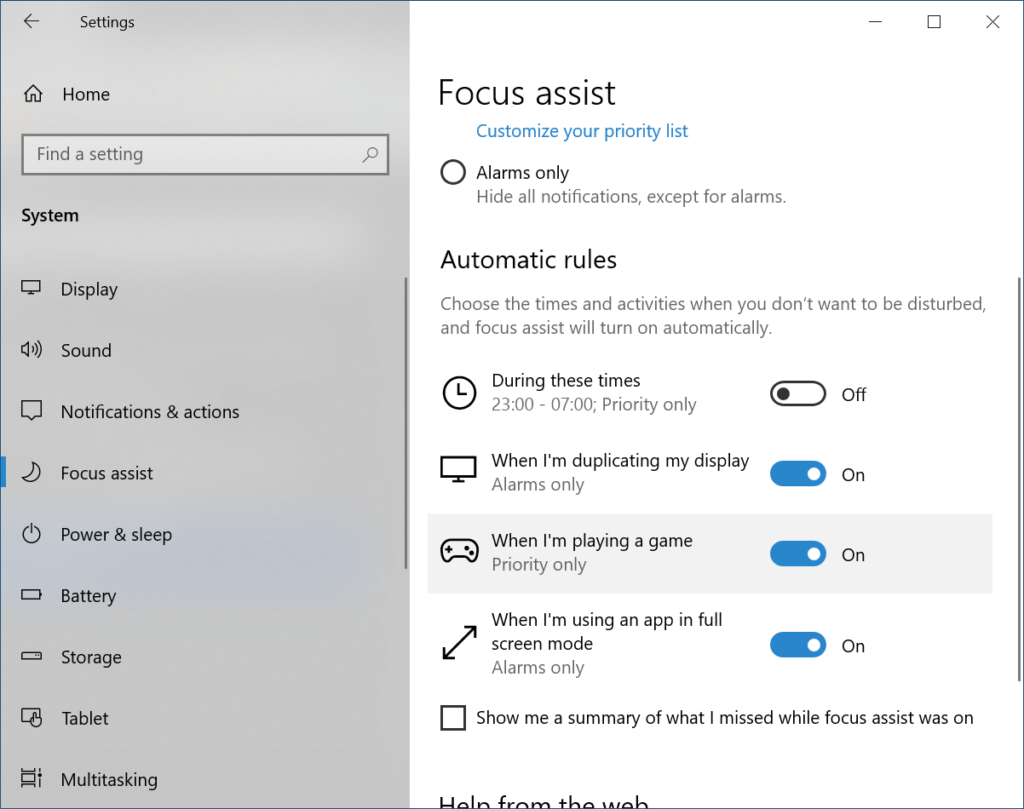
Step 3. Scroll down and under Automatic Rules, it says choose time and activities when you don’t want to receive any notifications. Toggle ON ‘When I’m playing a game’ or ‘When I’m using an app in full-screen mode’ options.
Close the screen and now Windows will not give you any notification when you are gaming.
Customize Visual Effects
Visual Effects play a vital role in gaming performance. By default, Windows appearance settings are set for the best appearance. We need to configure it to deliver the best performance.
Step 1. Press the Window key and type Performance in the search bar.
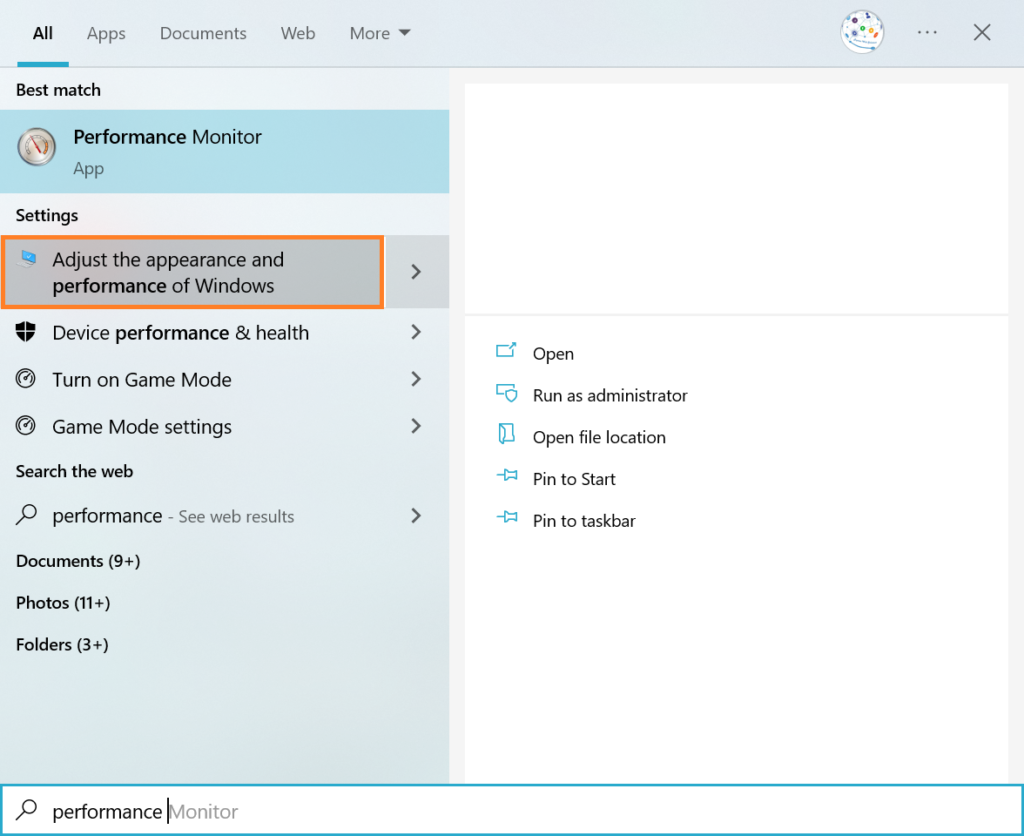
Step 2. Click on the ‘Adjust the appearance and performance of Windows’ option from the search results. A new window will open for customizing the performance options.
Step 3. Click on the ‘Adjust for Best Performance’ radio button and apply changes.
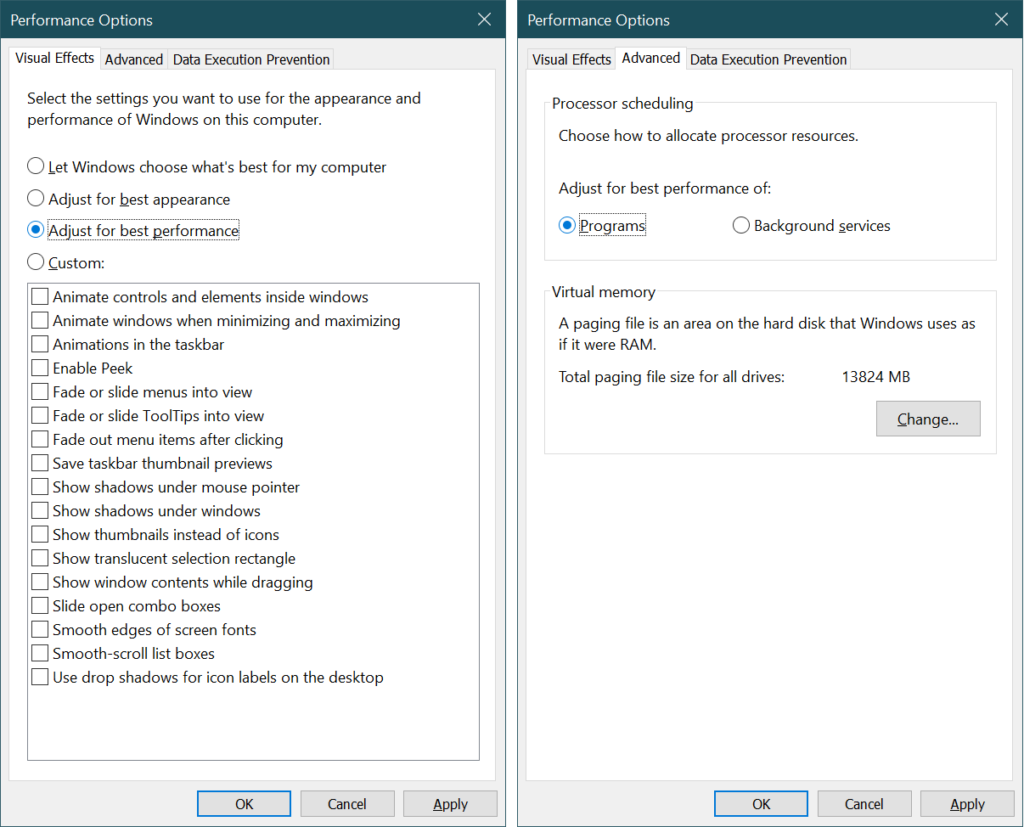
Step 4. Click on the Advanced tab on the top and under ‘Adjust for best performance of’ select Programs and apply changes. Restart the computer for the changes to take effect and boost gaming performance.
Use the Best PC Optimizer
If these manual steps on Windows 10 optimization for gaming are not working for you, you can make use of the best PC optimizers for Windows. Not all PC optimizers have a special feature to customize settings for gaming mode. We have compared and reviewed the best PC optimization tools and ranked Advanced System Optimizer as the best PC optimizer for Windows 11 and earlier versions.
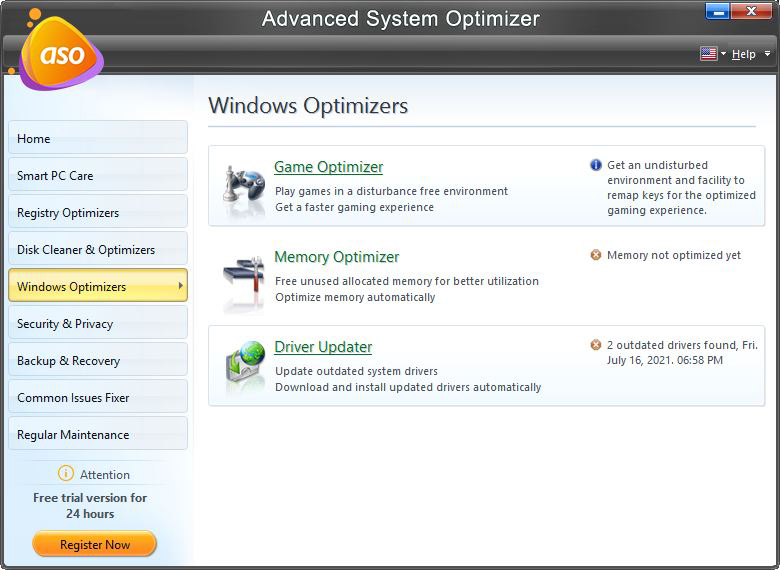
It has a special feature to optimize your PC and customize settings for an uninterrupted gaming experience. It has a dedicated Sandbox Mode to play uninterrupted games and customize settings for the best performance. It can free up RAM and optimize the memory to dedicate full power to your gaming zone. It also performs complete optimization for the overall better performance of your PC.
Summing Up
These Windows 10 performance tweaks for gaming are powerful for better configuration and converting your PC into an effective gaming zone. You can perform these tweaks to boost gaming performance and relish uninterrupted gaming. You can manually optimize Windows 10 for gaming or make use of the best PC optimization software. It is programmed to tweak changes and configure your PC for the best gaming performance. Tweak it up and make it a play station!

