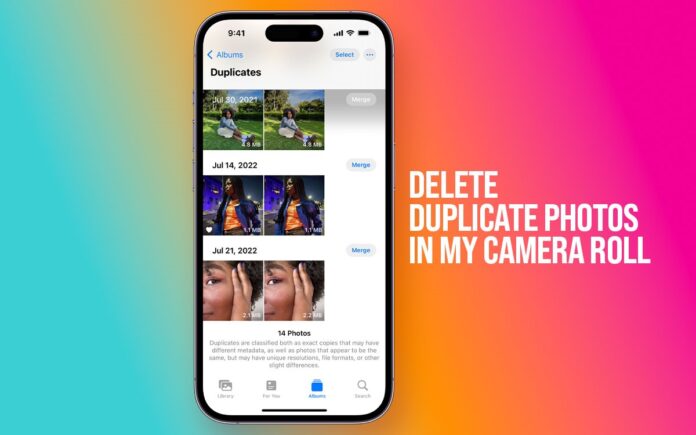
[web_stories title=”false” excerpt=”false” author=”false” date=”false” archive_link=”true” archive_link_label=”” circle_size=”150″ sharp_corners=”false” image_alignment=”left” number_of_columns=”1″ number_of_stories=”5″ order=”DESC” orderby=”post_title” view=”circles” /]When trying to capture the perfect shot, some people may even use several camera angles. But in the long term, these duplicate photos will consume a lot of storage space on your Mac and be a pain to deal with—Especially if you’re looking to organize your camera roll for more organized albums and to free up space on your Mac.
In response to this need, this article compiles several useful techniques to help you locate and delete duplicate photos on your Mac, thereby freeing up storage space on your computer. Begin reading immediately!
How can You Avoid Creating Duplicate Photos?
These steps can help you avoid creating duplicate photos on your camera or PC:
- Do not attempt to download the same image again and again.
- Do not sync all your storage devices on the same cloud storage account.
- Let the photo albums move to different destinations without interruption.
- Do not use the Burst Shot mode or capture images in the Continuous Shot mode.
- Save the edited image to its original destination instead of creating a copy.
- Do not frequently restore your PC backups to avoid duplicate photos.
- Always back up in the same folder to find duplicates easily.
Approaches to Manually Identify and Eliminate Duplicate Images
Manually scanning for and erasing duplicate photos on Mac is an option for those who want to be sure there are only so many duplicates that need cleaning up. Here are the top methods to delete the camera roll:
Method 1: Merge Duplicate Photos Using the Duplicates Album
Use the copy finder with the Photos app on Macs running macOS Ventura or later. This is a detailed tutorial.
Step 1: Fire up Photos on your Mac. Select “duplicate” from the menu that appears on the side. Your Mac will scan your photo library for duplicates, so please be patient.
Step 2: Choose to manage duplicate photos. (You have the option to choose multiple photos simultaneously.)
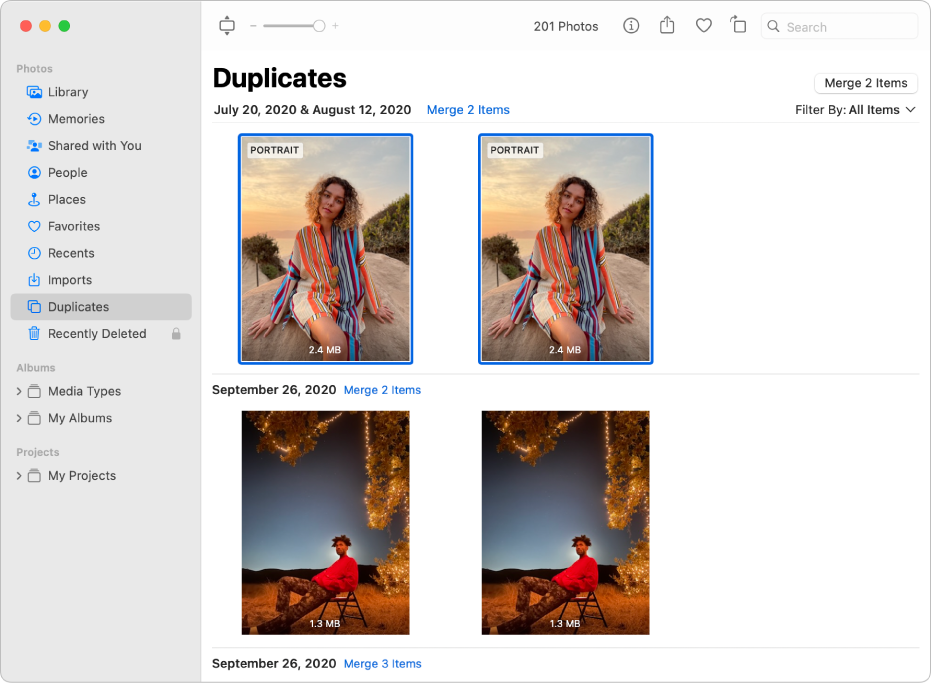
Step 3: Select the number of duplicates (n) and click the “Merge n items” button.
Step 4: Hit “Merge n exact copies” when prompted. Merging the copies and transferring them to the Recently Deleted album is what this does.
Step 5: The Recently Deleted album is the place to go to eliminate duplicates permanently.
Method 2: Locate and Eliminate Duplicate Images on a Mac with Finder
What should you do if you “find duplicate photos in my gallery?” Over time, you might have amassed many identical photos on your Mac and have yet to save them all in the same folder. You can easily locate duplicate photos to delete with the help of Mac’s Smart Folder function, which sorts such files by specific criteria. In this way, you will remove duplicate images of the camera:
Step 1: Select File > New Smart Folder in the Finder.
Step 2: Tap This Mac in the newly made folder, and then click the plus sign in the top right corner.
Step 3: You can quickly eliminate unnecessary duplicate photos by selecting them from the list of folders in the Kind drop-down menu.
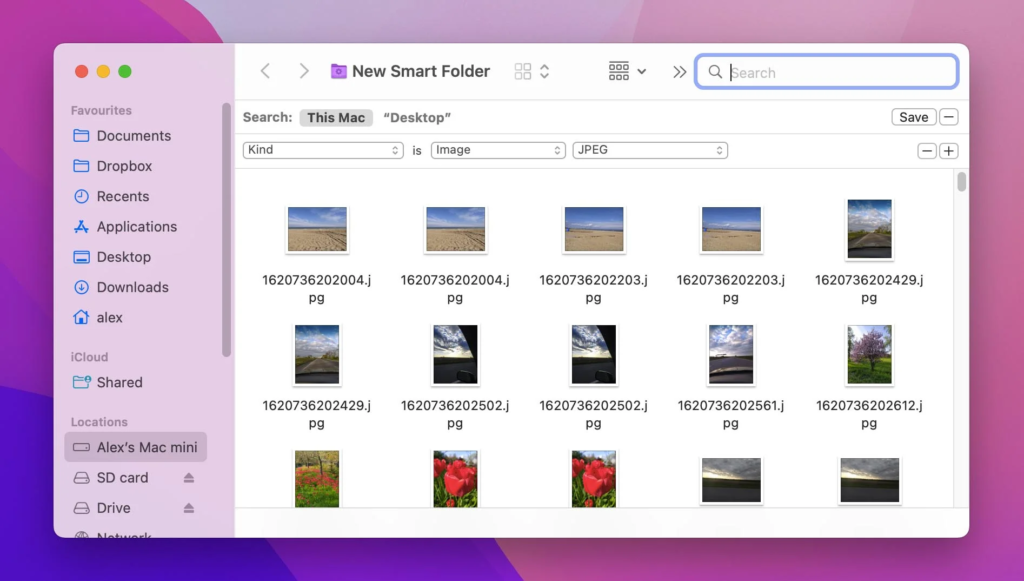
Step 4: You can directly put the duplicate photos in the trash using the control click.
Step 5: Finally, empty your trash can to remove all copies permanently.
Method 3: Manually Remove Duplicate Photos in the Photos App with Smart Album
Pictures are where you’ll find duplicates in the camera roll. On Mac, a clever feature lets users manually delete duplicate photos from the Photos app. All you have to do is make a smart album to help you.
Step 1: Navigate to File > New Smart Album in the Photos App. Be sure to specify the album’s filter criteria and give it a name. You can use filters like names to find duplicates or limit your search to just the photos you’ve marked as favorites.
Step 2: Pick out the images you want to remove. Select it with the right mouse button and then press the delete button.
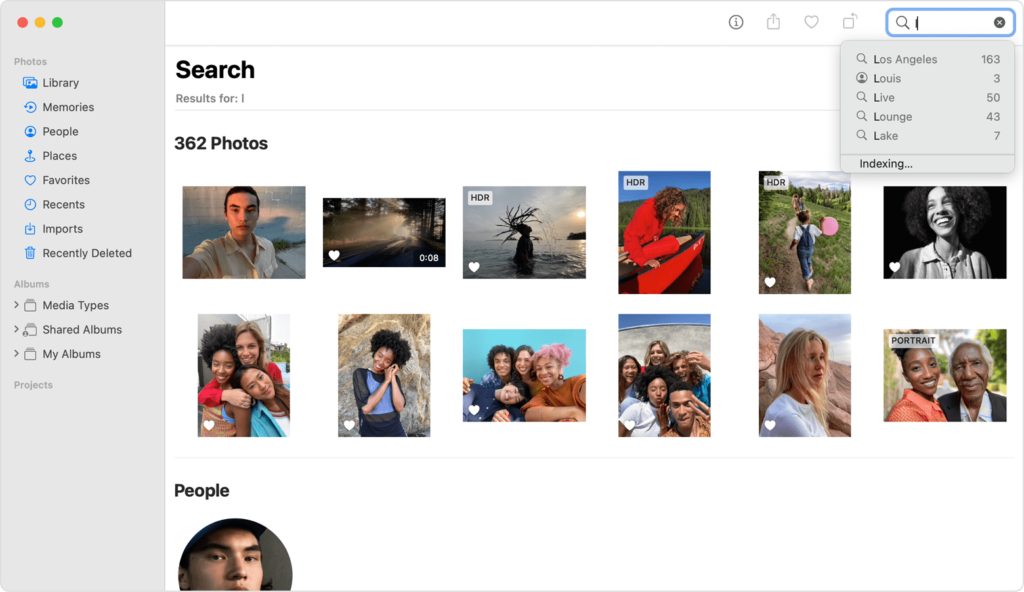
Step 3: Please go to Recently Delete on the left sidebar after you’ve deleted the photos.
Step 4: To remove them all simultaneously, use the Delete All button in the top right corner.
Step 5: Once the process of removing duplicate photos is complete, you can find the Smart Album in the sidebar of the Photos app. You can clean up the other duplicate photos the next time you need to.
Method 4: Utilize Duplicate Photos Fixer Pro
Here are the steps to use Duplicate Fixer Pro:
Step 1: Get Duplicate Photos Fixer Pro Started.
Step 2: Choose Add Photos/Add Folder or drag and drop images to scan.
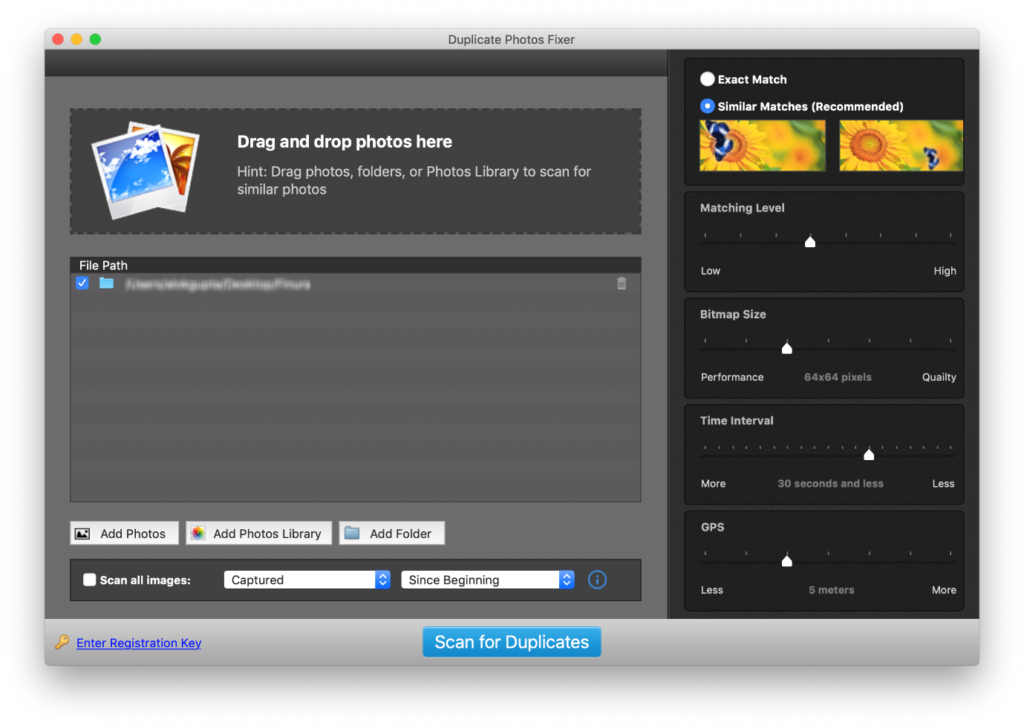
Step 3: Pick between “Similar” and “Exact” comparisons for each match.
Step 4: To find similar images, adjust the Matching Level.
Step 5: Afterwards, select Scan for Duplicates from the menu.
Step 6: Just be patient and let it finish.
Step 7: A window displaying the scan results will appear after this. Use the Selection Assistant or the Auto Mark feature to choose the detected duplicates.
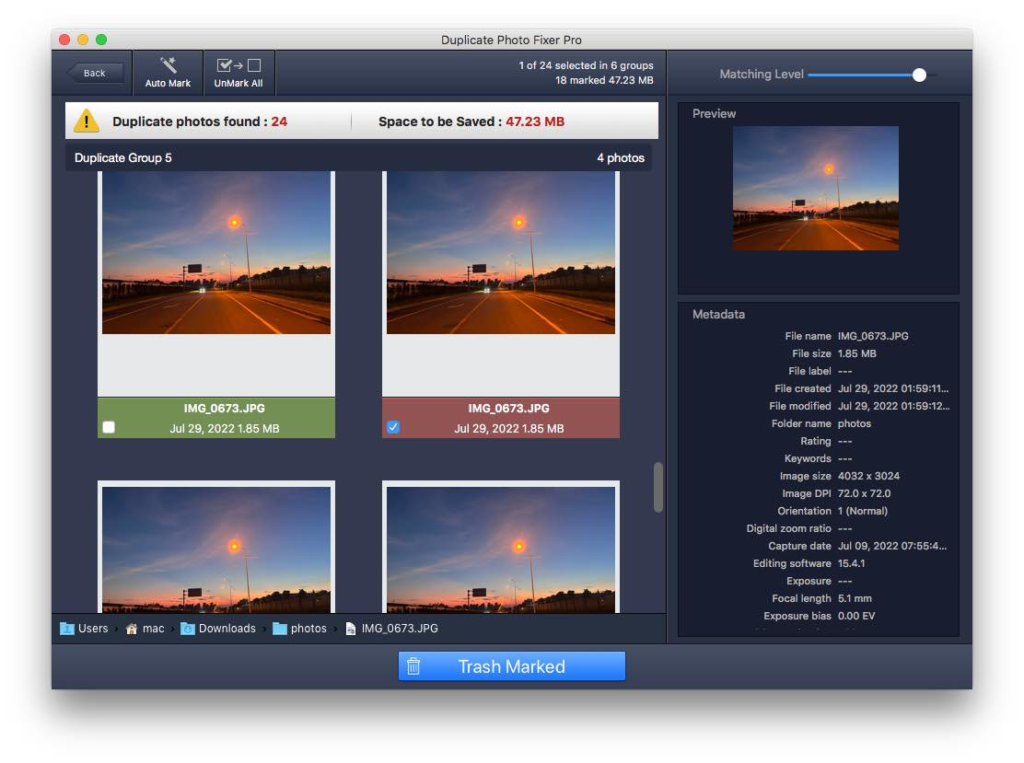
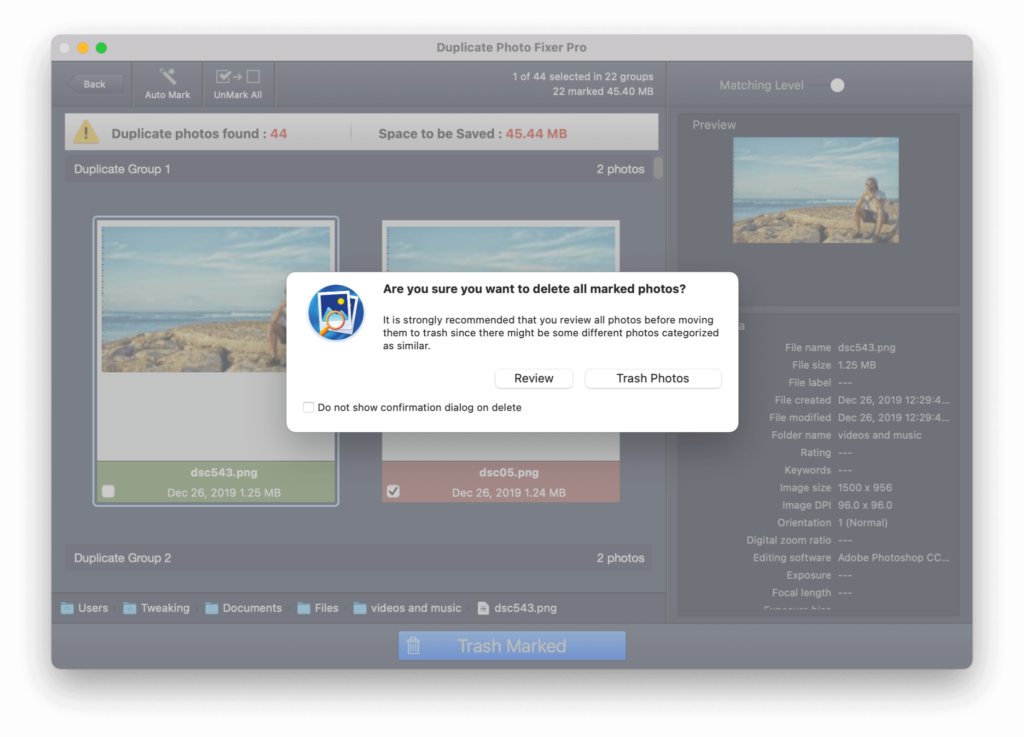
Step 8: Lastly, to remove the images, click the Delete Marked Button.
This is a simple method for cleaning Windows of duplicate images.
What is Duplicate Photos Fixer Pro?
You can quickly and easily eliminate duplicate images with the help of Duplicate Photos Fixer Pro for Windows, a robust duplicate photo finder. Consequently, you can make a tonne of additional space on your computer by organizing your photo library. Although it has a straightforward user interface, a powerful and intelligent algorithm runs the show, complete with efficient scanning and classification techniques. It can connect to other devices; another reason this tool is fantastic. You can use this to remove duplicate images of the camera.
Features:
- Scanned are all forms of duplicate
- Requires no external drives or memory cards
- Support for multiple languages
- Protect your cloud data
Conclusion
Manually getting duplicate photos and removing them is a tedious and time-consuming process. Identifying and categorizing each item requires your undivided attention and takes time. Yet, with Duplicate Photos Fixer Pro, you can speed up the development of the unique Duplicate Finder by eliminating such tedious tasks. As a result, many people will recommend Duplicate Photos Fixer Pro as the best tool for getting duplicate photos and removing them from a Mac.

